
Remote Desktop
Setting up Remote Desktop
Remote Desktop is a feature of Windows that will allow you to access your office computer from any other computer you use. It is easy to use, and easy to get it set up.
Before being able to use Remote Desktop off-campus, you must do so using a VPN connection. To obtain access to Cameron’s network using VPN, you must have access approved via C3 form beforehand.
Step One - Office Computer
First, you need to find out if the PC has been configured for Remote Desktop and what your computer name is. To discover this, right-click on My Computer, click on the Remote tab, and check the Remote Desktop section. Ensure that "Allow users to connect remotely to this computer" is checked.
Your full computer name should also be listed there, and should appear something like PCN-AME12345.cameron.edu. Make a note of the full computer name.
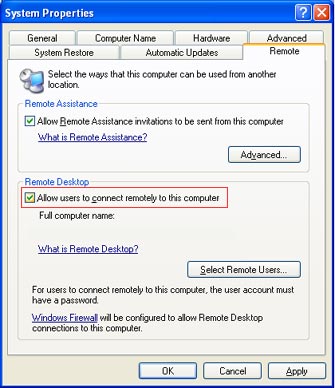
If you made any changes to the Remote Desktop settings, click Apply, then OK, and finally reboot your computer.
For you to be able to access your office computer from home via Remote Desktop, your computer must be powered on.
Step Two - Home Computer
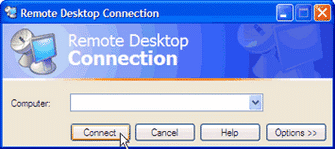
To connect to your office computer, click on the START menu, select Programs, Accessories, Communications, and then click on Remote Desktop Connection. Enter the full name of your computer that you had noted, e.g. PCN-AME12345.cameron.edu and click on Connect.
You will need to login with your Cameron username and password, and should be able to work remotely on your office computer from home!